Home > J. Layout Map > Step fielder-layout-001
How to
{manual.fielder.layout.map.when1}
Starting state: {manual.fielder.layout.map.precondition1}
- {manual.fielder.layout.map.step1}
- {manual.fielder.layout.map.step2}
- {manual.fielder.layout.map.step3}
- {manual.fielder.layout.map.step4}
- {manual.fielder.layout.map.step5}
Expected result
{manual.fielder.layout.map.expected}
If it does not work
- {manual.fielder.layout.map.troubleshoot1}
Step-by-step screenshots
Follow the red-numbered hotspots in the images below alongside the steps above.
1. {manual.fielder.layout.map.step1}
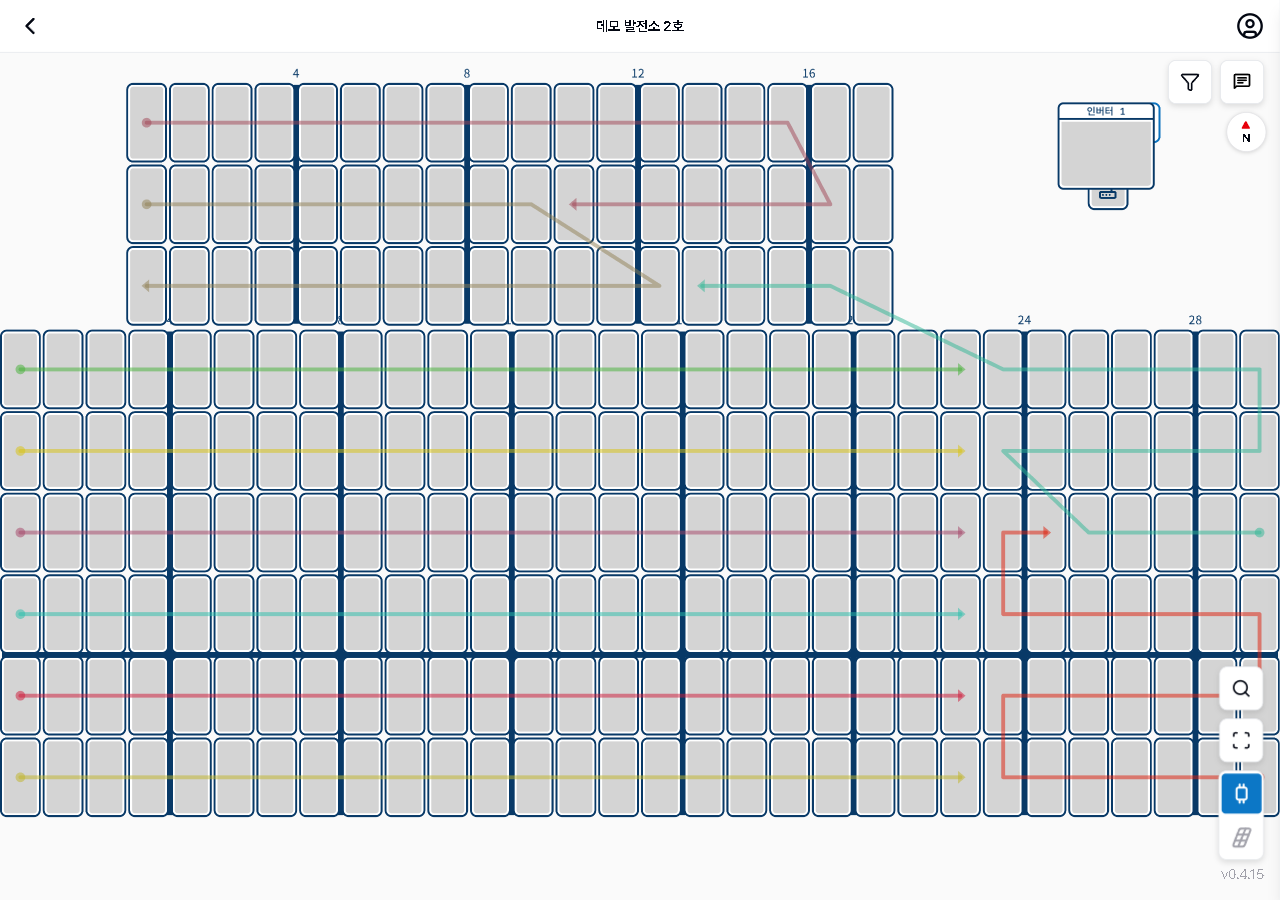
1
레이아웃 맵 전체 화면
Full layout map — panel grid, color-coded string arrow lines, Inverter 1 icon, compass (N), 4 tool buttons on right
- Panel grid area — panels arranged as rectangles with column numbers (4,8,12,16) at top
2. {manual.fielder.layout.map.step2}
No screenshot linked to this step yet.
3. {manual.fielder.layout.map.step3}
3
레이아웃 맵 전체 화면
Full layout map — panel grid, color-coded string arrow lines, Inverter 1 icon, compass (N), 4 tool buttons on right
- Inverter 1 icon — where string lines converge
4. {manual.fielder.layout.map.step4}
4
레이아웃 맵 전체 화면
Full layout map — panel grid, color-coded string arrow lines, Inverter 1 icon, compass (N), 4 tool buttons on right
- Compass (N) — tap to reset map orientation to north
5. {manual.fielder.layout.map.step5}
No screenshot linked to this step yet.